Stuff that I do at work, a few snapshots
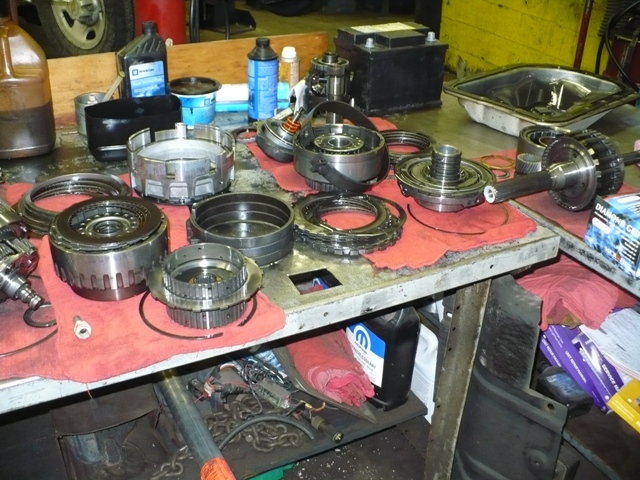
A 6L90 tranny on the bench |
I had to repair a 6L90 tranny at work the other day. This is one of GM's new six speed automatic transmissions. These units seem to be well engineered and thought out. They have
a 6L80 and 6L90 truck longitudinal tranny which this is the 90 series version. They also have a 6T40/45 and 6L70/75 transverse version for cars which is pretty compact and tough
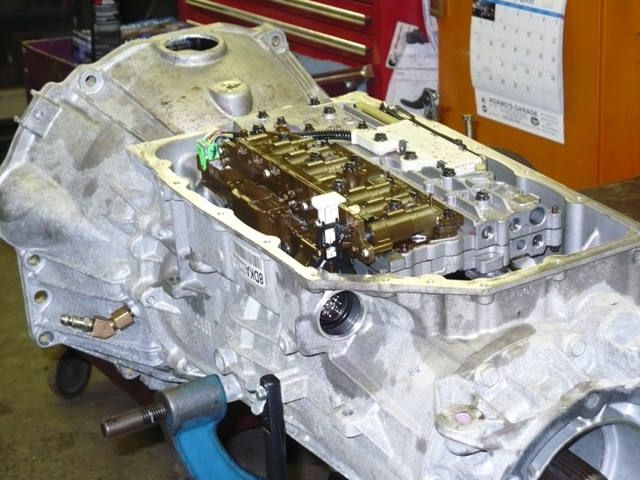
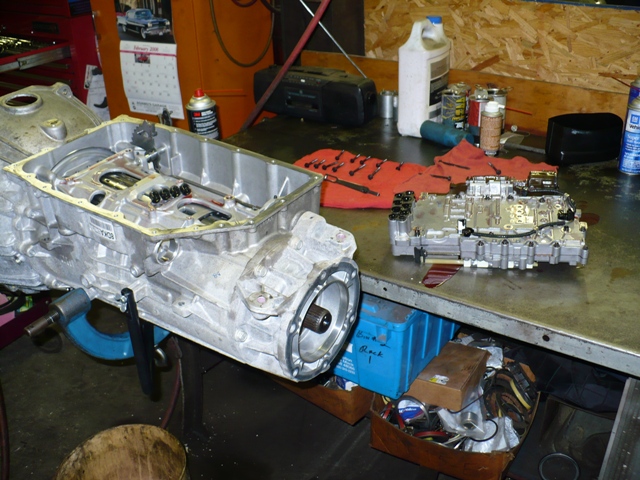
The pan off exposing the valve body/solenoid/TCM assembly |
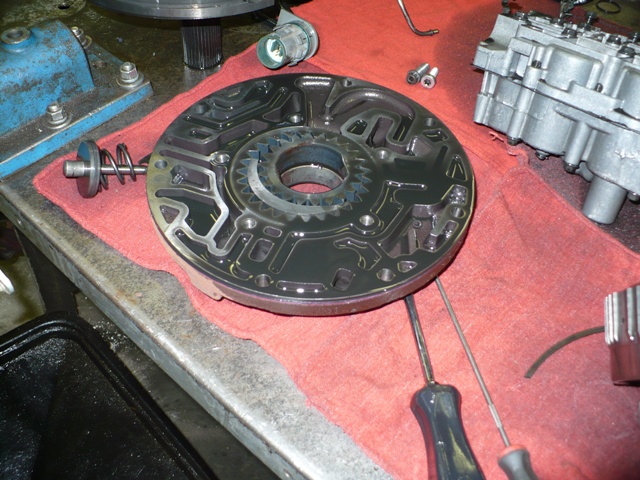
The valve body assembly taken off exposing seals |
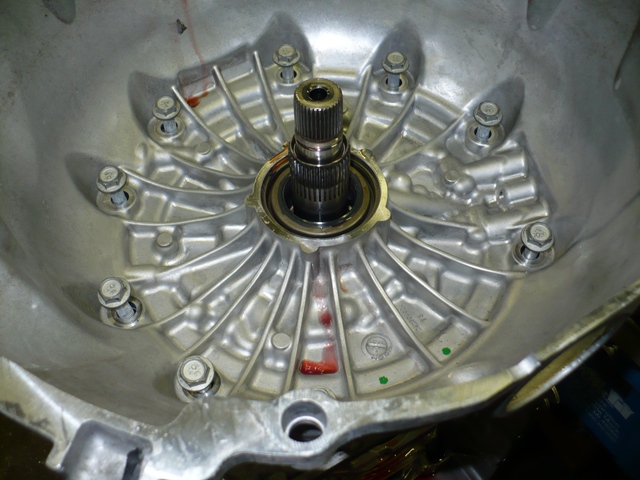
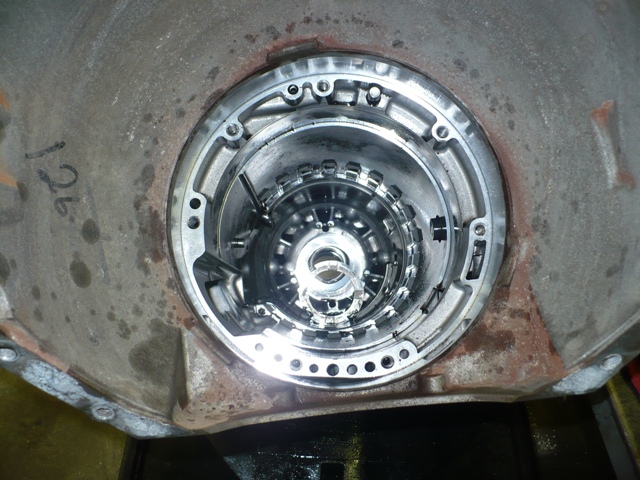
Remove bell housing/pump bolts |
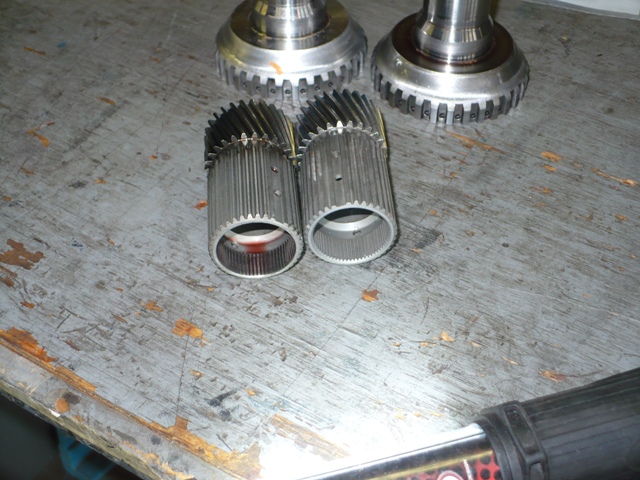
The pump can be pulled off exposing sealing rings |
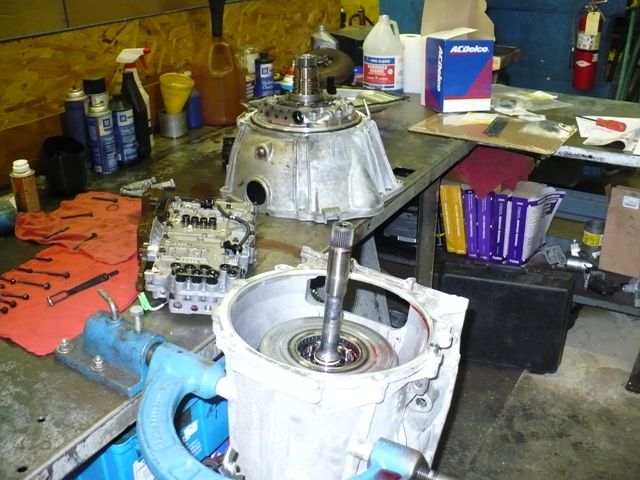
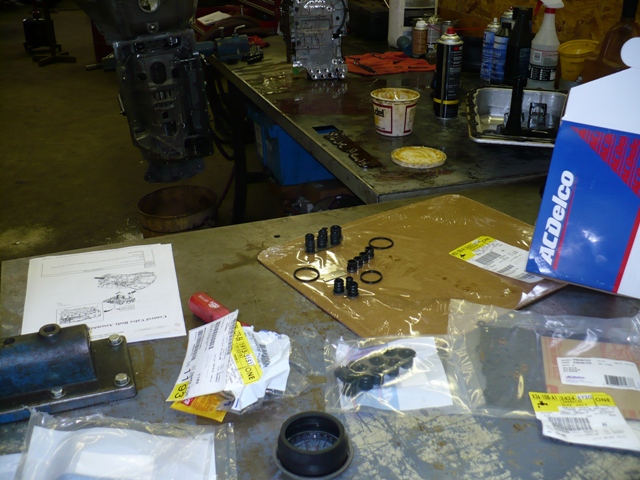
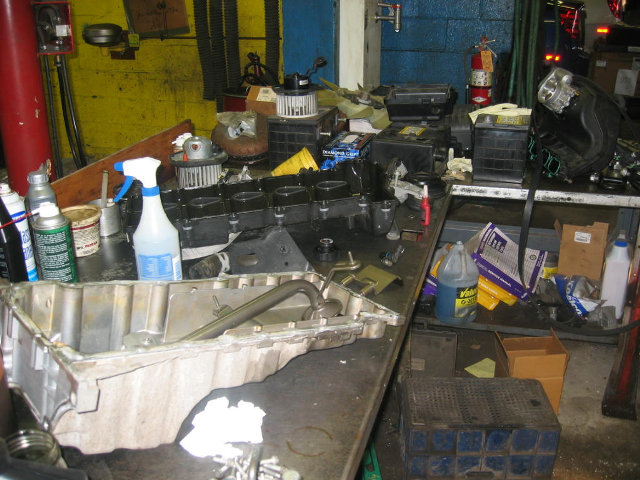
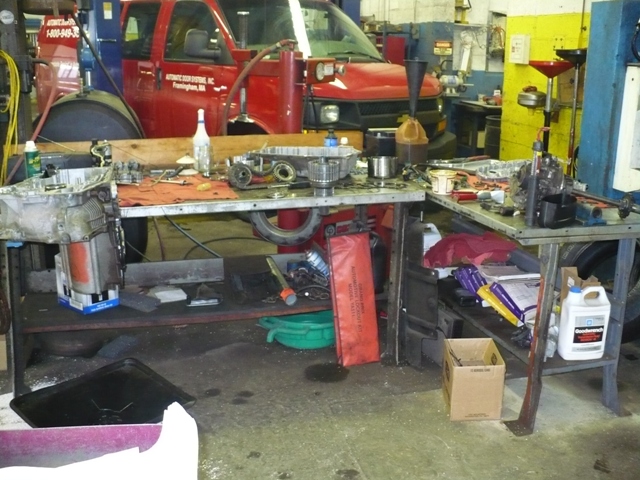
Parts to be put in |
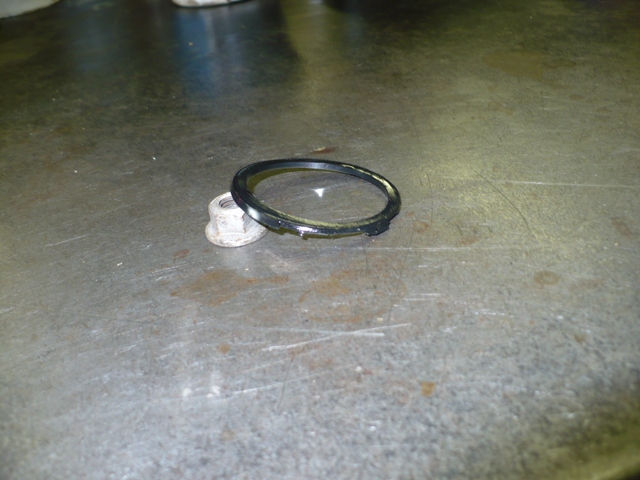
This tranny needed the three sealing rings on the back of the pump/bell housing cover to be replaced.
This is done by first removing the valve body with solenoid TCM assembly attached as this unit has seals which push on the internal parts. Removing the bell housing without taking this off will break stuff! The pump bolts can then be removed and the assembly pulled off.
I replaced these rings for a slip in reverse and re-installed the pump assembly and then installed the valve body with new seals.
The transmission control module is in the sump on these attached to a plastic block that houses all the solenoid valves. This eliminates wiring, and allows the whole solenoid assembly
to be bench tested as a unit. The range switch in this tranny is also inside the case mounted on the valve body. This isn't so bad as it keeps them out of the water/rust/air/snow/ice of the outside
world. At least in the tranny they know just to expect 200 degree temperatures and tranny fluid, nothing else. The unit is very easy to remove due to some of these changes
|
Alright that job's done, what's next?
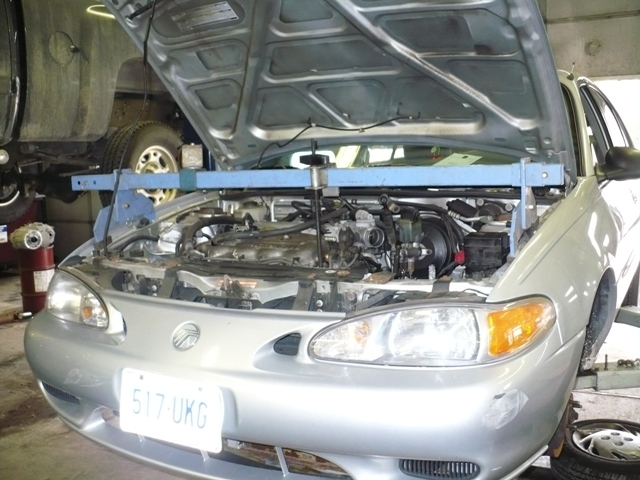
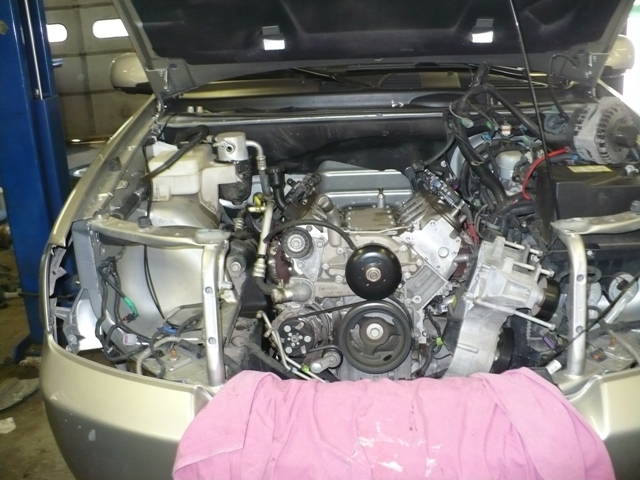
Alright the dreaded 1997 Mercury Tracer automatic transmission replacement. This car came in with a smoked tranny and it seemed innocent enough, so I decided to tackle a junkyard tranny replacement.
Unbeknownst to me, the folks at Mercury (or Mazda) use old beer cans to make their cars and after ten years, the body is rotting out everywhere underneath which caused much grief when every other bolt
decided to snap in half upon removal. Oh well, I'll know not to work on one of those again!
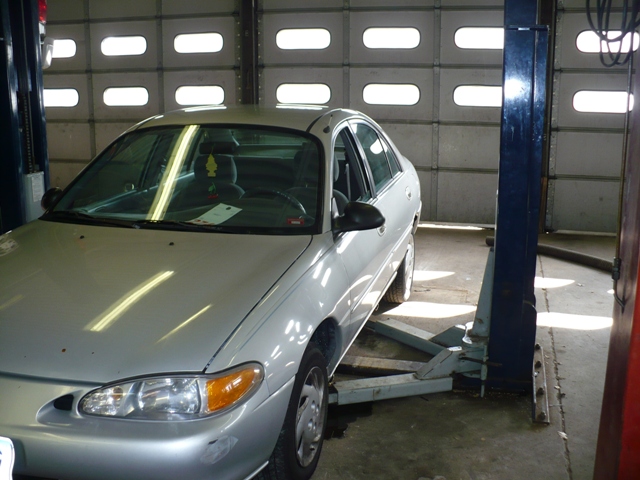
Nice Tracer |
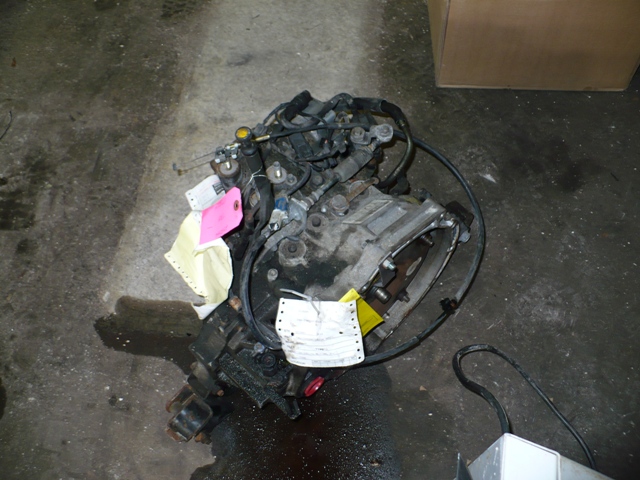
Nice Tracer Tranny |
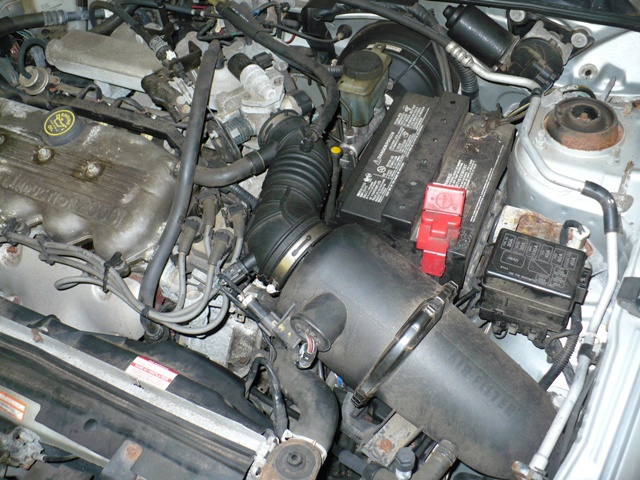
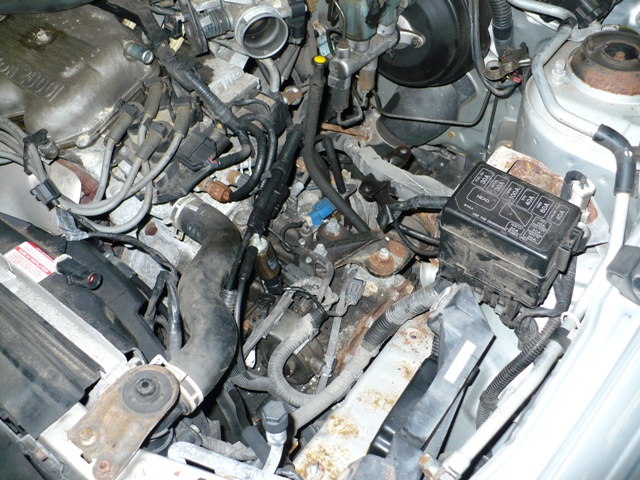
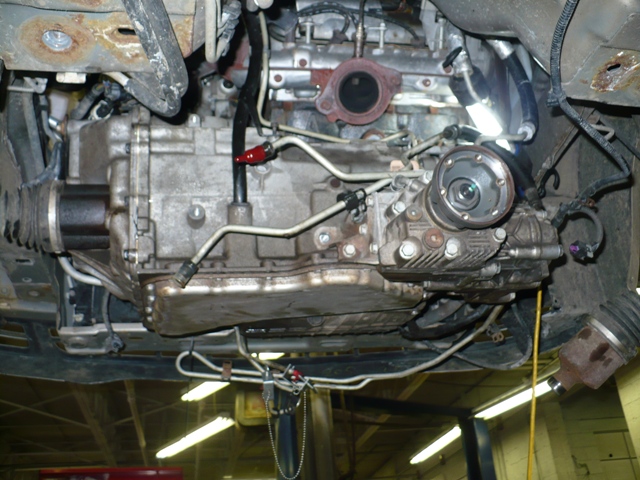
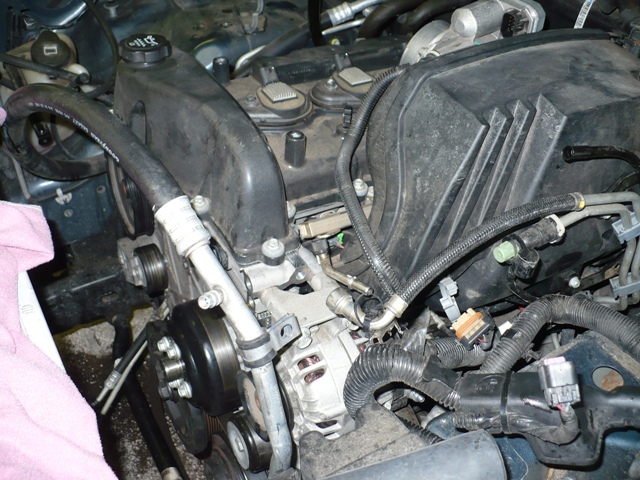
Packed engine compartment |
Stuff removed from engine compartment to see top of tranny |
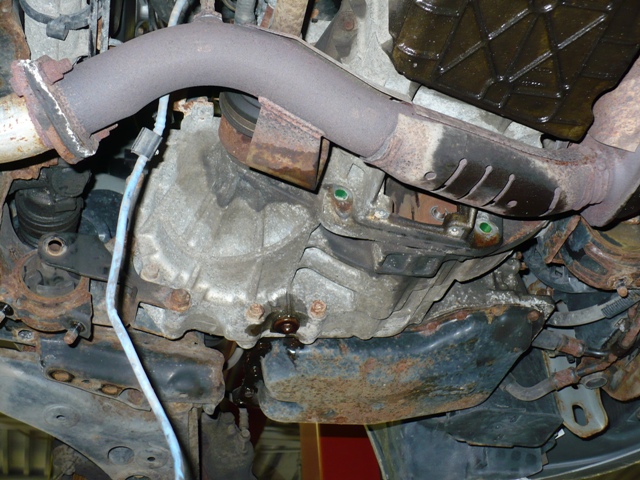
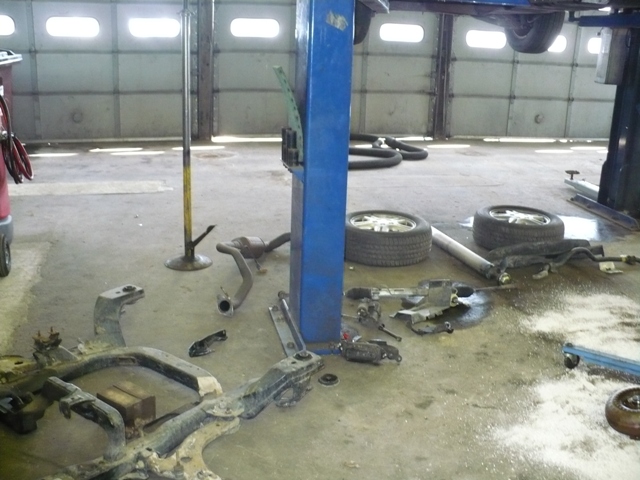
The crossmember under tranny is removed and fixture holds engine from falling down |
View from below |
Well at that point it was time to go home and the next day I toiled for many hours removing the tranny and replacing it. Of course I forgot the camera and that vehicle was on the receiving end of
a few choice words. After the frame bolts broke, the torque converter seized on the engine, the lower control arm pivot pins froze to the spindle and all 20 of the splash shield bolts broke, it left
the shop moving on it's own. .. Keep moving Tracer, far away, keep moving!
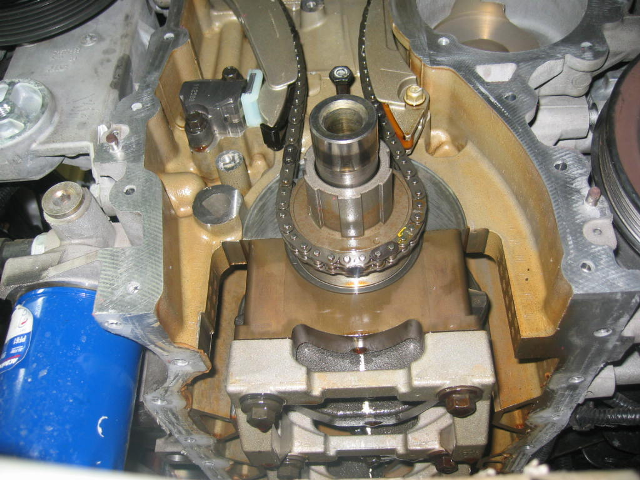
The next job is a Chevy Colorado with a severe slapping noise from the front cover. Removal found the timing chain tensioner stuck in position causing heavy chain slack (and slap).
Unfortunately to pull the front cover you have to take the oil pan off and to do that you have to remove steering rack. A new tensioner guides and chain solved the problem
2004 Colorado front engine view |
Colorado oil pan and other parts on bench |
Next job, a 2004 Express Van with a slipping tranny, only slips slightly in 2nd and 3rd under load. This vehicle is a heavily loaded work truck with well over 100,000 miles. My suspicions is there is really no root cause of failure.
Most likely a hard work filled life caused slow degregation of clutches and then lack of fluid changes with clutch filled fluid sealed its fate. The fluid is black and nasty. When tranny was torn apart just general clutch
wear was found. I completely overhauled the unit with all new seals, clutch plates and flushed converter and cooler good.
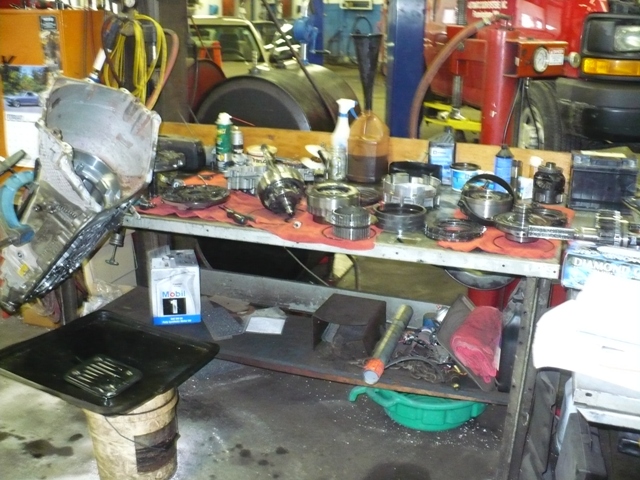
Tranny out and apart on bench |
Inside of gear transmission oil pump, nasty black clutch filled fluid! |
Gutless transmission! |
Guts on bench! |
The next job is a 2003 Chevrolet Venture Van with a 4T65-E transmission and all-wheel drive. It has an intermittant no drive or reverse when cold. It is fine after 5 minutes of warming up.
I'm going to suspect an issue with the input clutch housing piston seal or piston itself. The reason I suspect this is that it is a common issue and I have no codes set. It also happens in both
drive and reverse and my line pressure is normal when it is occurring. Sure enough when it is removed and pulled apart, the input clutch piston seal is shredded and the inner piston surface
that rides on it is deformed somewhat. I replaced the affected parts, the seal and piston.
This job is a major pain in the rear to remove and reinstall (as opposed to the regular non-all wheel drive Venture) as it has a transfer case attached to the end of the tranny making cradle removal difficult and power steering rack removal mandatory.
Engine cradle and other parts removed to make way for tranny removal |
Back of tranny showing transfer case. |
Old input seal shredded |
Pending common problem, fourth gear inner splines starting to round off |
Other end of 4th gear shaft, hard to see sharpened splines on the right one, in this view |
Venture tranny on bench in pieces |
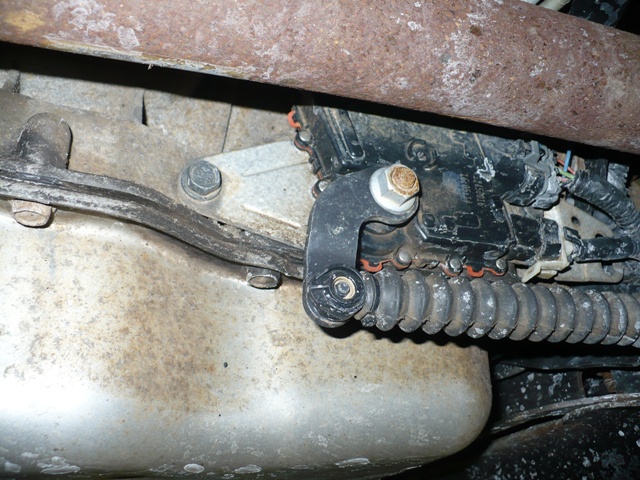
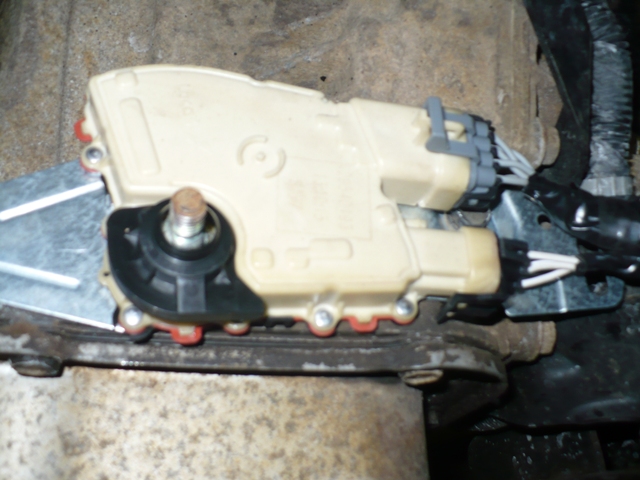
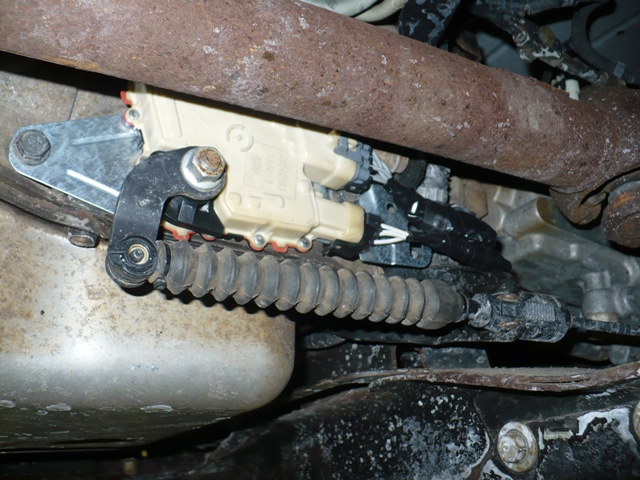
Common problem with Allison LC1000 series transmissions, Range switch on trans is in a high water splatter area on unit and water works its way into switch causing wrong range selection input values. Since this
transmission relies heavily on computer control to apply the multiple solenoids in unit, when the computer doesn't know what range it's in, it does all kinds of strange things, clunks, no movement.
They usually set range switch codes and the old switch is black in color to indicate that it has a problematic designed switch. The only trouble with these (and all similar GM truck range switches)
is that the potting material on the switch connector area melts with heat and seals the connectors to the switch so removal is impossible. On the smaller trucks we leave the switch attached to the
harness when we remove the transmissions(as long as the switch is fine which it usually is on the 4L60-E trannies). On these units, though switch replacement is the problem so the wires have to be
cut and new connectors attached to the harness. This is time consuming; switch replacement takes only minutes, but putting on the new connectors takes at least an hour.
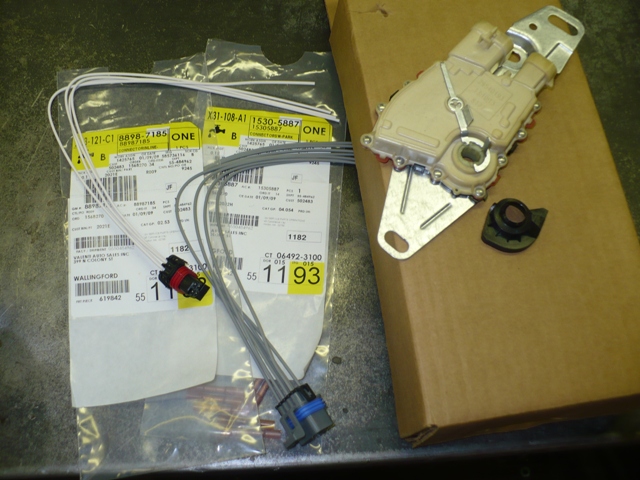
Old bad switch, water sprays onto part where shaft goes through switch |
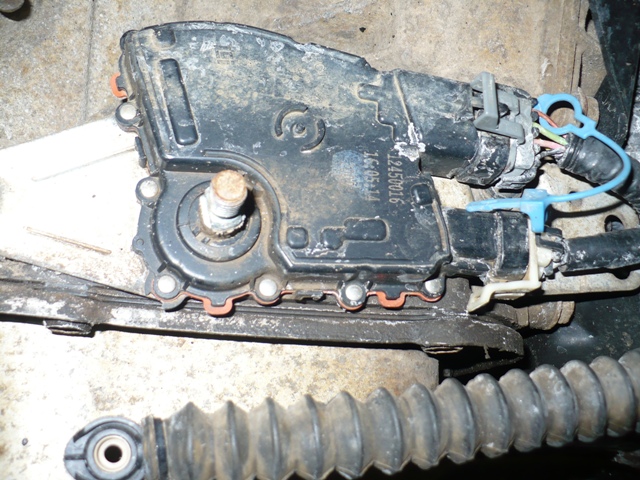
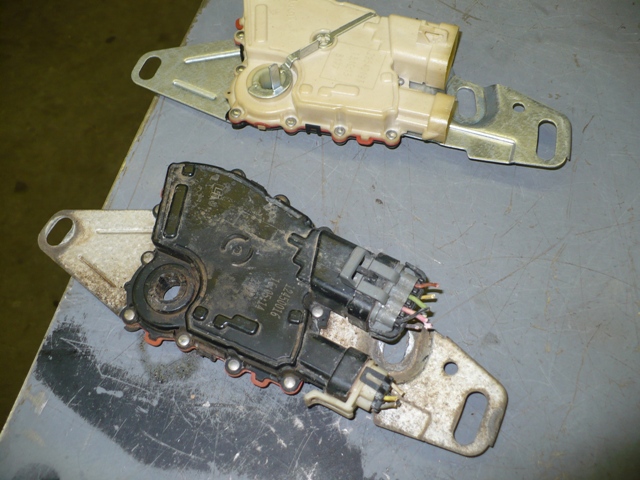
Switch with driveshaft and selector lever removed, old connectors glued to switch |
New parts, new design switch is neutral colored, black piece is a water shield |
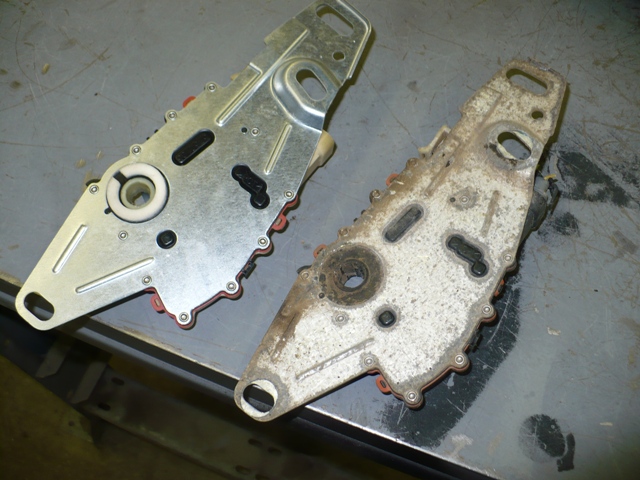
Back of switches; new design has white foam water seal in back also. |
Front view, note connectors had to be cut off with old switch |
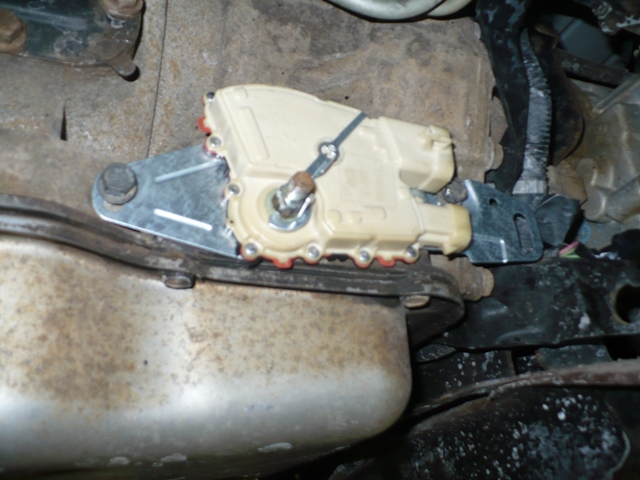
New switch installed, waiting for new connectors |
New connectors wired in, new water shield installed |
All better! |
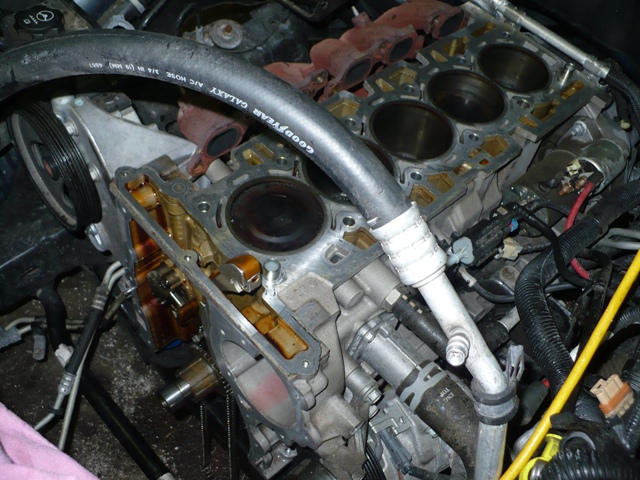
Newest trouble to roll into the door. A 2006 Chevy Colorado with an intermittant check engine light. This vehicle shows random misfires at idle only on cylinders #2 and #5. This is sometimes enough
to turn on CEL but not always right away. This is typical of a problem with these inline 5 cylinder heads where the valve seats aren't hardenened enough and fail early. Ruling out an ignition or fuel system misfire,
an engine leakdown test is performed on this warm engine. This test fills each cylinder with air when it is at top dead center with both valves closed. If there is a significant difference between
the air that goes in the cylinders and air that leaks out of the cylinders, the test indicates mechanical issues with cylinder sealing. In these cases, there is usually a major difference between
cylinders five or two from the rest of them. Sure enough, most cylinders are below 15% and cylinder five is at 85% leakdown.
The only problem with these is that when you use the Kent-Moore special tool to hold the timing chain in the lower end, it either slips off the guide from being too loose or hammers the tensioner in
causing it to stick in, from being too tight. Adding to this is the fact that the guide that the tool is pushing against to hold the chain, has to be unbolted from the top to remove the head. If it
moves at all, the tensioner will ratchet out.
In either situation the oil pan and front cover have to be removed to retime engine causing an extra 12 hours or so to be added to the repair.
On an average only about 25 % of these head repairs can be done without having to pull the lower end. This particular job, the tool was inserted as according to directions but movement of
the left side guide on head removal caused tensioner to extend and tool to be useless causing more work. In this one, the front axle also has to be repositioned as it interferes with the oil pan
removal (4WD).
Axle rotated, oil pan removed to remove sump tube from front cover |
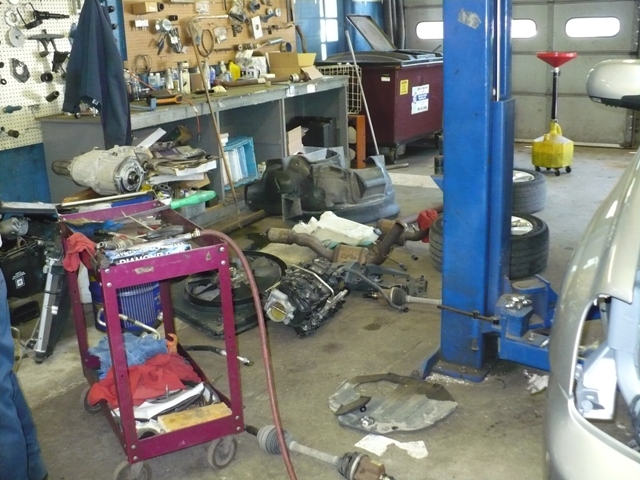
Parts and stuff take up three benches! |
Engine with no cylinder head, front cover or oil pan |
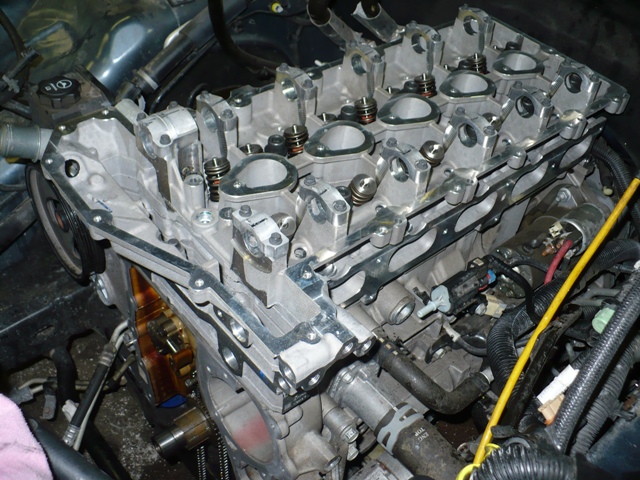
New cylinder head, new gaskets |
New head on engine |
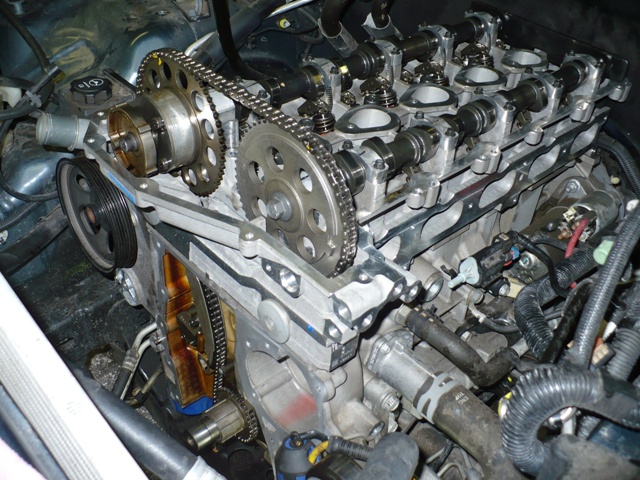
Cam and Sprockets installed, all timed up |
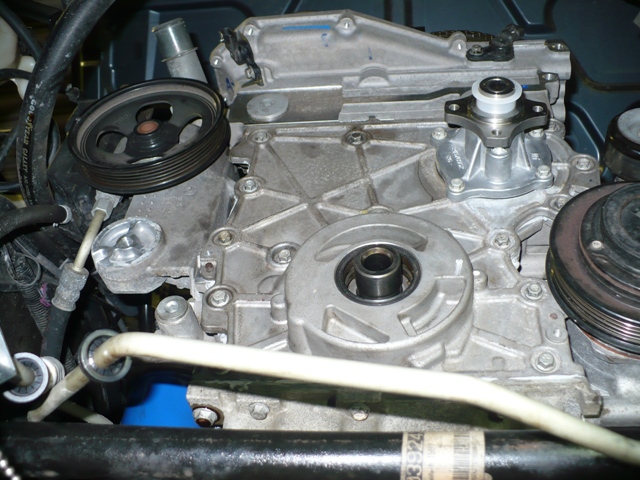
Timing cover and oil pan installed |
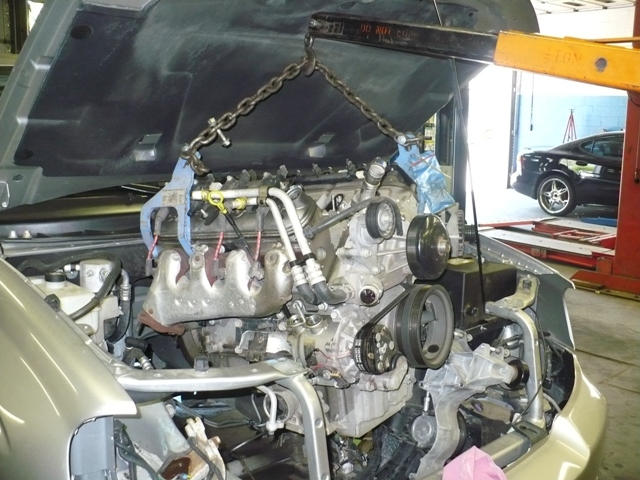
Almost all the way together minus fan and shroud |
OK, next trouble to roll into the door. A 2006 Chevy Trailblazer SS 6.0 Liter with a heavy engine knock. Taking this vehicle for a ride, it gave all the classic symptoms of a connecting rod or main bearing fatigue failure.
It had a loud engine knock that got louder as it heated up and was more pronounced under a load. Pulling it into the bay, the noise was coming from the bell housing area on the lift. After separating the flywheel from the torque converter,
the noise was still there (definately coming from the engine). As this engine has the all-wheel drive
differential going through the oil pan and takes 16.8 hours warranty time to R&R, I decided to pull the tranny to make sure it wasn't a cracked flywheel or something silly like that. After this was done, flywheel looks good,
time to pull the engine! Pulling this bear out, sure enough, it has a completely spun #7 main bearing and a few other bearings showing signs of contact stress fatigue. The pictures show the progress . .
A multitude of things removed, getting ready to remove engine |
Dead stall and four benches will eventually be filled with parts |
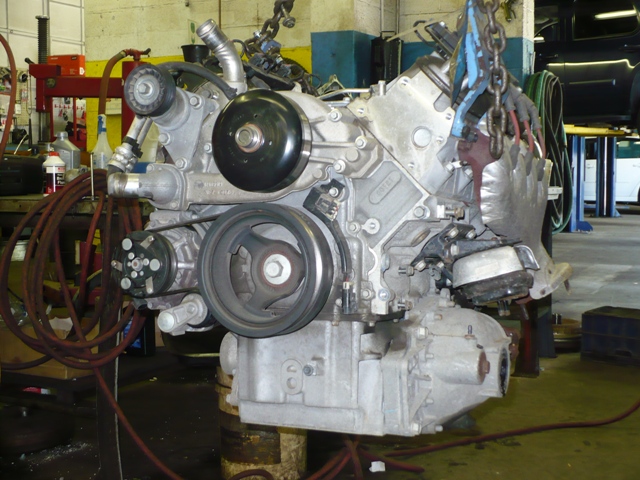
Monstrous 6.0 Liter engine coming out, this thing sure fills the engine compartment! |
Engine hanging, you can see AWD differential bolted through engine oil pan |
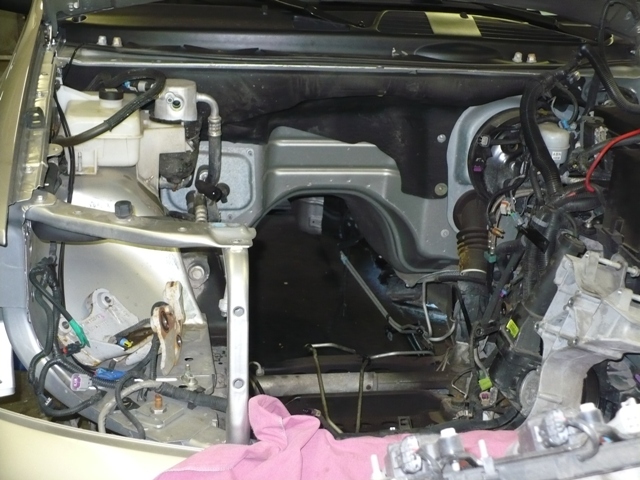
Empty engine compartment |
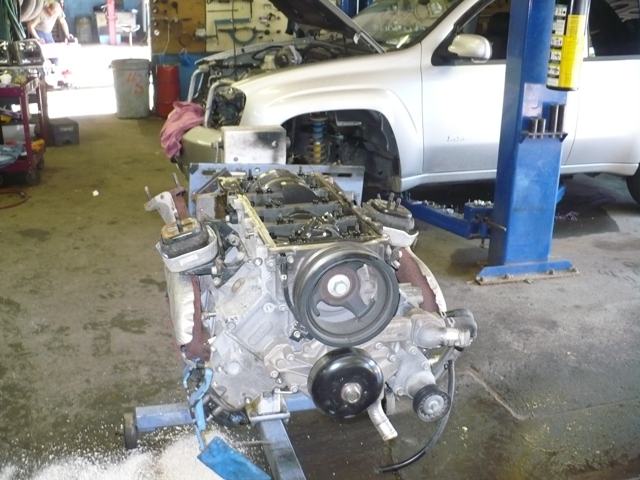
On engine stand, differential, oil pan and baffle removed |
#7 spun rod bearing |
Another view of damage, paper thin bearing |
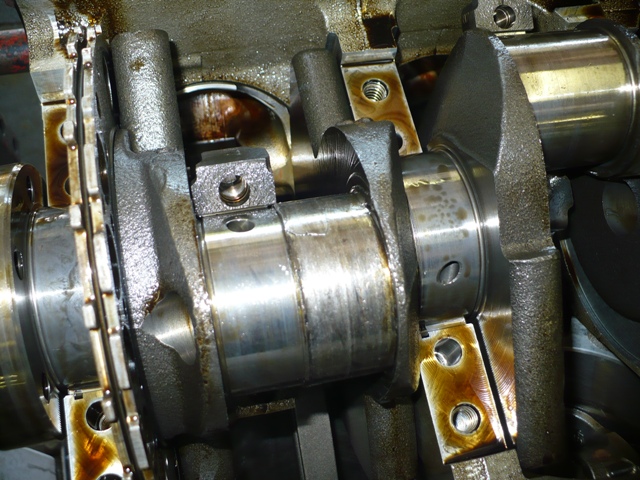
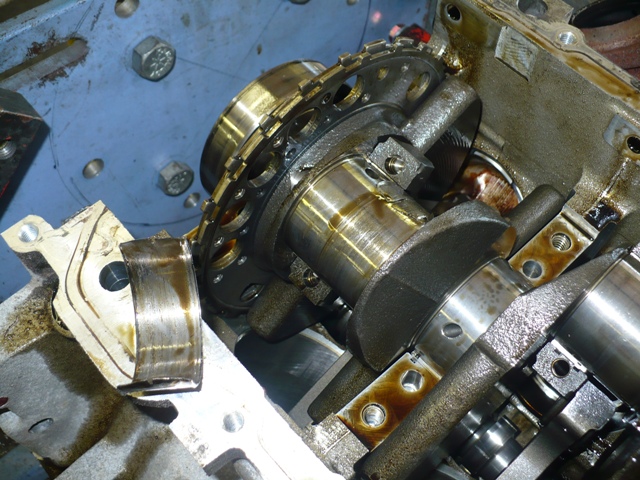
crankshaft removed |
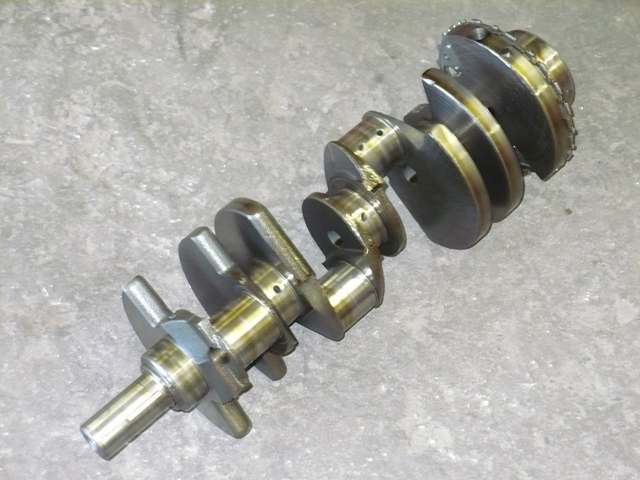
Old crank headed for the scrap yard! |
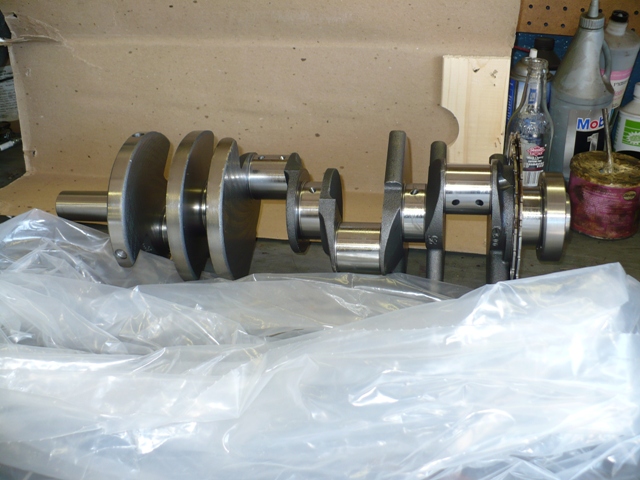
The old crank and all bearings were then removed. I cleaned all debris, installed new main bearings, installed crankshaft, installed all rod bearings and clearanced them also. There are only standard bearings available stock, but
all clearances were between 0.002 in and 0.0008 in. The front timing chain and gears were installed. The oil pump was taken apart, cleaned, and checked for wear. Being OK, it was reinstalled and the sump and oil baffle were then
installed. I still need to find one of the nuts for the oil baffle. The problem with doing these big jobs is that you have new and old parts scattered around, things fall into the speedy dry or under benches or in a drawer
in your tool box! You forget which bolts go to what sometimes. I try to keep the bolts with the part they were removed so they can go back together with that same part and throw all the old parts into a box reserved for
old parts (sometimes they have to be saved for warranty proof ). The problem when you lose a nut or bolt working on an engine or transmission is that you don't know if it might have fallen into the open engine or transmission
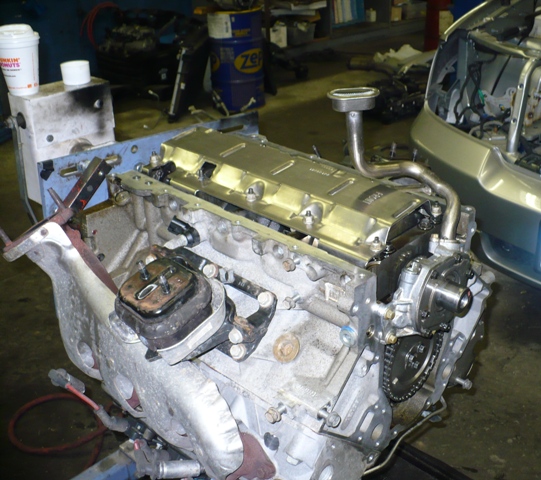
so it gives peace of mind to account for everything. This engine is still being worked on, but should be finished in a few days.
New crankshaft, only $700 or so. |
All new main bearings, new rod bearings, clearances checked, timing chain and gears, oil baffle, sump tube and pump back on |