|
The hybrid fueled rocket project here at Central Connecticut State University started in the spring of 2009 in the senior project research class - ME 497. The beginning of this was spent learning DOE (Design of Experiments). The ending of the class was spent learning Microsoft project and figuring out what we were going to do for our senior project. One of the topics suggested by Dr Naoumov, the resident famous Russian rocket scientist here at school, was to build a hybrid propelled rocket mounted horizontally on a test stand with instrumentation to measure thrust and combustion pressure. The purpose of this was to evaluate different types of cheap solid fuels for their viability in real world applications. The entire class of six people chose this topic and I was elected project leader.
It's funny, I think the word "rocket" in the project's name worried some in the administration so we were forced to change the name. The professor changed it to "Investigation of the Combustion of Non-Conventional Fuels in the Alternative Reaction Engine" but I think we should name it The Hybrid Propulsion project" in the coming semesters as it is shorter and might generate more interest than our current thirteen word name!
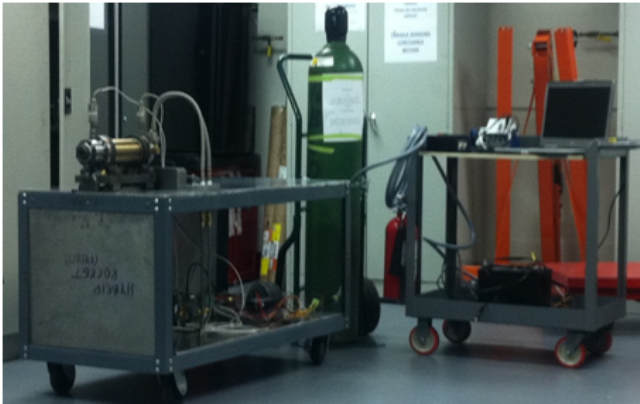
We evaluated all the designs in all of the previous projects done at different universities and decided on a design of our own around the end of the spring 2010 semester. We decided to go with a heavy duty double shelved cart which would allow us to put our rocket and stand on the top level and run our control systems underneath. This way the control systems would be shielded from the heat of our test firing and any contaminants that would be expelled from the test firing. We wanted to achieve a few things. Since we were going to use a load cell that would be easier to read and interpret the readings, we wanted to have a design that would have a free linear forward motion into that load cell. We also wanted to have instrumentation that had a high degree of repeatability, that is, a design that didn’t have any variation due to the rocket being assembled in a different fashion. The design that we wanted to have should be able to have the fuel changed with minimal disassembly and with the least amount of disturbance to the fixture.
 |
|
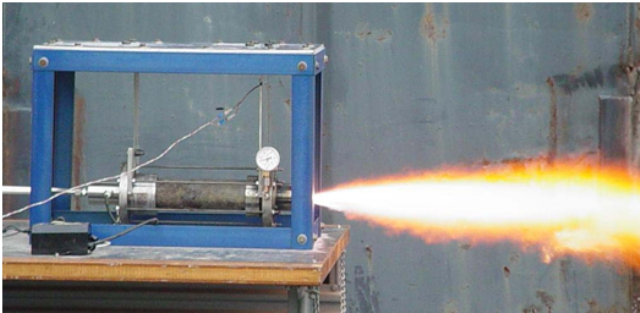
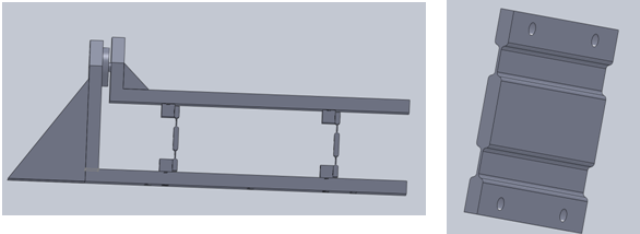
We looked at a number of previous designs, some designs are shown above from 2000 and 2004. We felt that hanging the rocket as they did and measuring the flex of longitudinal beams with strain gauges was not accurate enough. The fixture itself seems to be prone to harmonic vibration and the beams could deform plastically to cause an issue with repeatability. The rocket itself was also difficult to assemble and disassasemble and we wanted something a little more accurate and repeatable.
 |
|
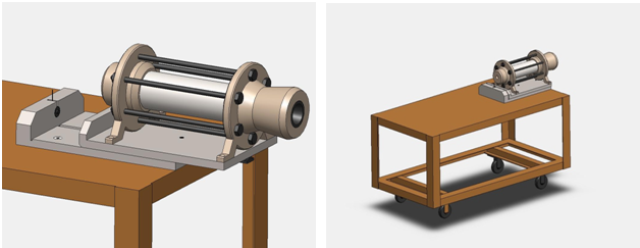
These are some of our initial designs. The first used two plates, the lower plate held a load cell and the upper plate secured the rocket on a dovetailed slide. This was designed to have the rocket slide in a linear motion into the load cell. We thought that issues with friction, side to side play and rocket assembly were too great with this design. The second design was mine, it used the same two plates (and would have the rocket mounted on the top plate as in the first design) but used two simple flex plates to allow flex in the forward direction but was extremely stiff in the side to side direction so as not to add side to side harmonic vibration to the equation. Clicking on the second picture gives some more details as to my design.
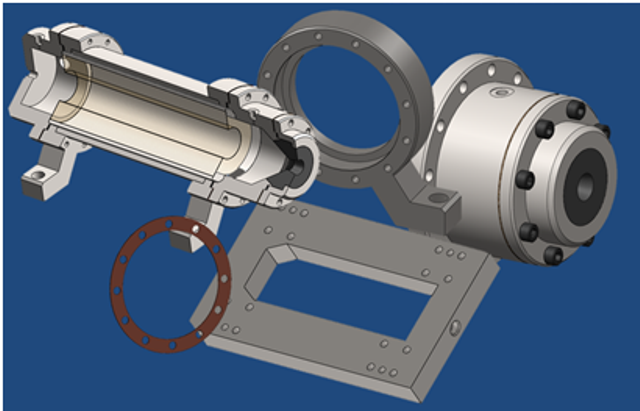
We finally decided on a final design that used linear motion into the load cell but used a solid block mounted to the cart to hold the the load cell and linear bearings bolted to the cart with a solid plated mounted on them holding the rocket. This would alow the rocket plate to slide forward the few thousand's into the load cell for a thrust measurement. I was a little wary of the linear bearings as I though they might have play in the direction orthogonal to the thrust centerline which would cause vibration but I was outvoted. I would then split the group into two sections, three guys to build the rocket and stand and me and my guys on designing the control and instrumentation systems.
 |
|
The real design details would end up being worked out in the beginning of the fall 2010 semester and we would manage to get the actual rocket built and the control systems in place in just a matter of one semester which was a significant amount of work. The class was split into two groups, one for the rocket itself and the other for the design of the instrumentation and control systems. I would design the latter systems with two team members to help assemble and test.
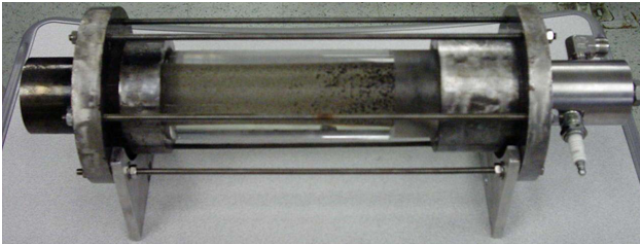
As you can see, we designed the rocket so it would remain bolted to the stand with all plumbing attached even between tests when the fuel had to be changed. We simply had to remove the rear section, slide the tube that contained the spent fuel out of the open rear end of the rocket engine, refill the tube or silde a new one in, and rebolt the assembly together. This made it easier to reload than all the previous designs we had seen.
Since I have worked in all kinds of different areas and have a degree in Computer Engineering Technology, I ended up designing the entire control system for the rocket engine. Our instrumentation was designed by me and the other two members of my team per the specs given to us from the professor and the examples of what to do and what didn't work with the previous attempts at this type of project.
I used a Texas Instruments MSP430 microcontroller and programmed it to do what we needed our control system to do. Details can be found here but we basically needed to turn two solenoids on upon firing, turn the ignition fuel off after about two seconds (we are using propane to initiate combustion) and turn the one that supplys our oxidizer off after we had enough time to reach steady state and get our readings.
I also built an astable multivibrator circuit using a LM555 timer chip and a resistive capacitive circuit that supplies a square wave to an ignition coil and a spark plug to initiate our combustion upon the fire command. The solenoids and ignition circuits are mounted on the rocket cart and a twenty foot 17 pin multiconductor cable connects all control and sensor signals to our separate control cart.
 |
|
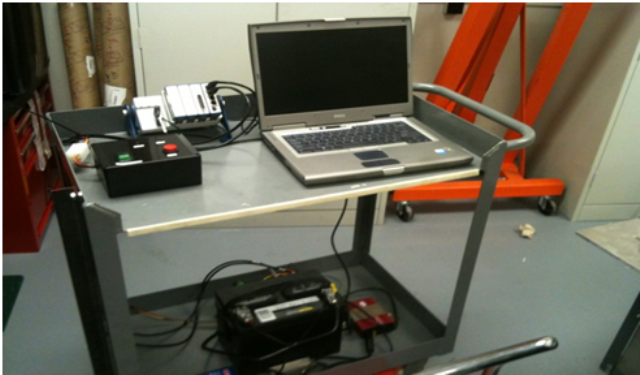
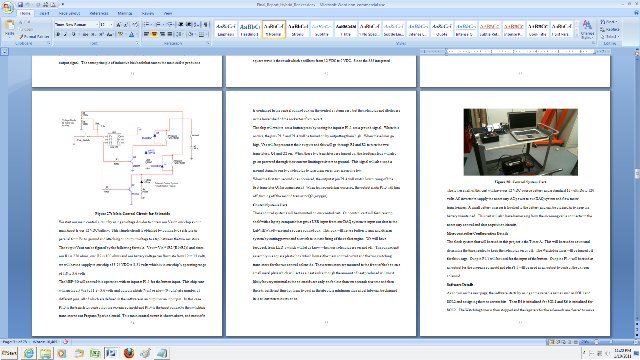
This control cart also houses a laptop running a LabVIEW DAQ system and LabVIEW software to interpret and record our sensor readings while the rocket is fired. The control circuits are housed on the cart in a small enclosure which has feedback LED's for the solenoids, a power switch and a fire button. As we want this whole system to be independent so we can pick our location of test firing, this cart also houses a twelve volt automotive battery and a 120 volt inverter for devices needing 120 VAC power.
Our instrumentation system consists of a capacitive load cell, two pressure transducers mounted fore and aft and a flow meter to measure oxidizer flow rate mounted below deck. These devices are connected to the 17 pin Mil spec 5015 connector on cart and carried through a multiconductor cable to our DAQ system mounted on the control system cart.
 |
|
We wrote a final report on our project, it was 78 pages worth and since I designed the control systems and the rocket team gave me no input, I had to write about fifty of them. It was important to document all the systems so future teams would have exact details and know what our train of thought was in designing it. I can't tell you how many times, I've analyzed a design and have been put off by lack of documentation. It came out pretty professional looking. I had it spiral bound it so it would last.
This course was a valuable experience for me and everyone involved. We accomplished a lot and it taught me and my team a valuable lesson in how to work together to accomplish what some people said we couldn't do in one semester. I have stayed on the project as an independent study for the Spring 2011 semester to teach my design to the new team and to accurately finish testing the systems involved. I also want to document the final results and see the first hot test with paraffin as a fuel and gaseous oxygen as the oxidizer. Maybe I will post a video of the rocket firing.